
5. Configure MAAS
5.1. Access MAAS web interface
At this point, MAAS should be installed and configured; however, it’s worth verifying the most important options in the MAAS web UI. You may also want to modify a few settings. To do so, follow these steps:
Verify you can access the MAAS web UI:
Launch a browser and point it to
http://172.24.124.1:5240/MAAS(changing the IP address as necessary).You should be able to access the server on either its internal or external network address, although at this point, the only computer on the internal network may be the MAAS computer itself.
If you provide the computer with a hostname in DNS or
/etc/hosts, you should be able to access it via that name, as well.You should see a login prompt.
Log in to the web UI using your regular username and the password you gave to the setup script.
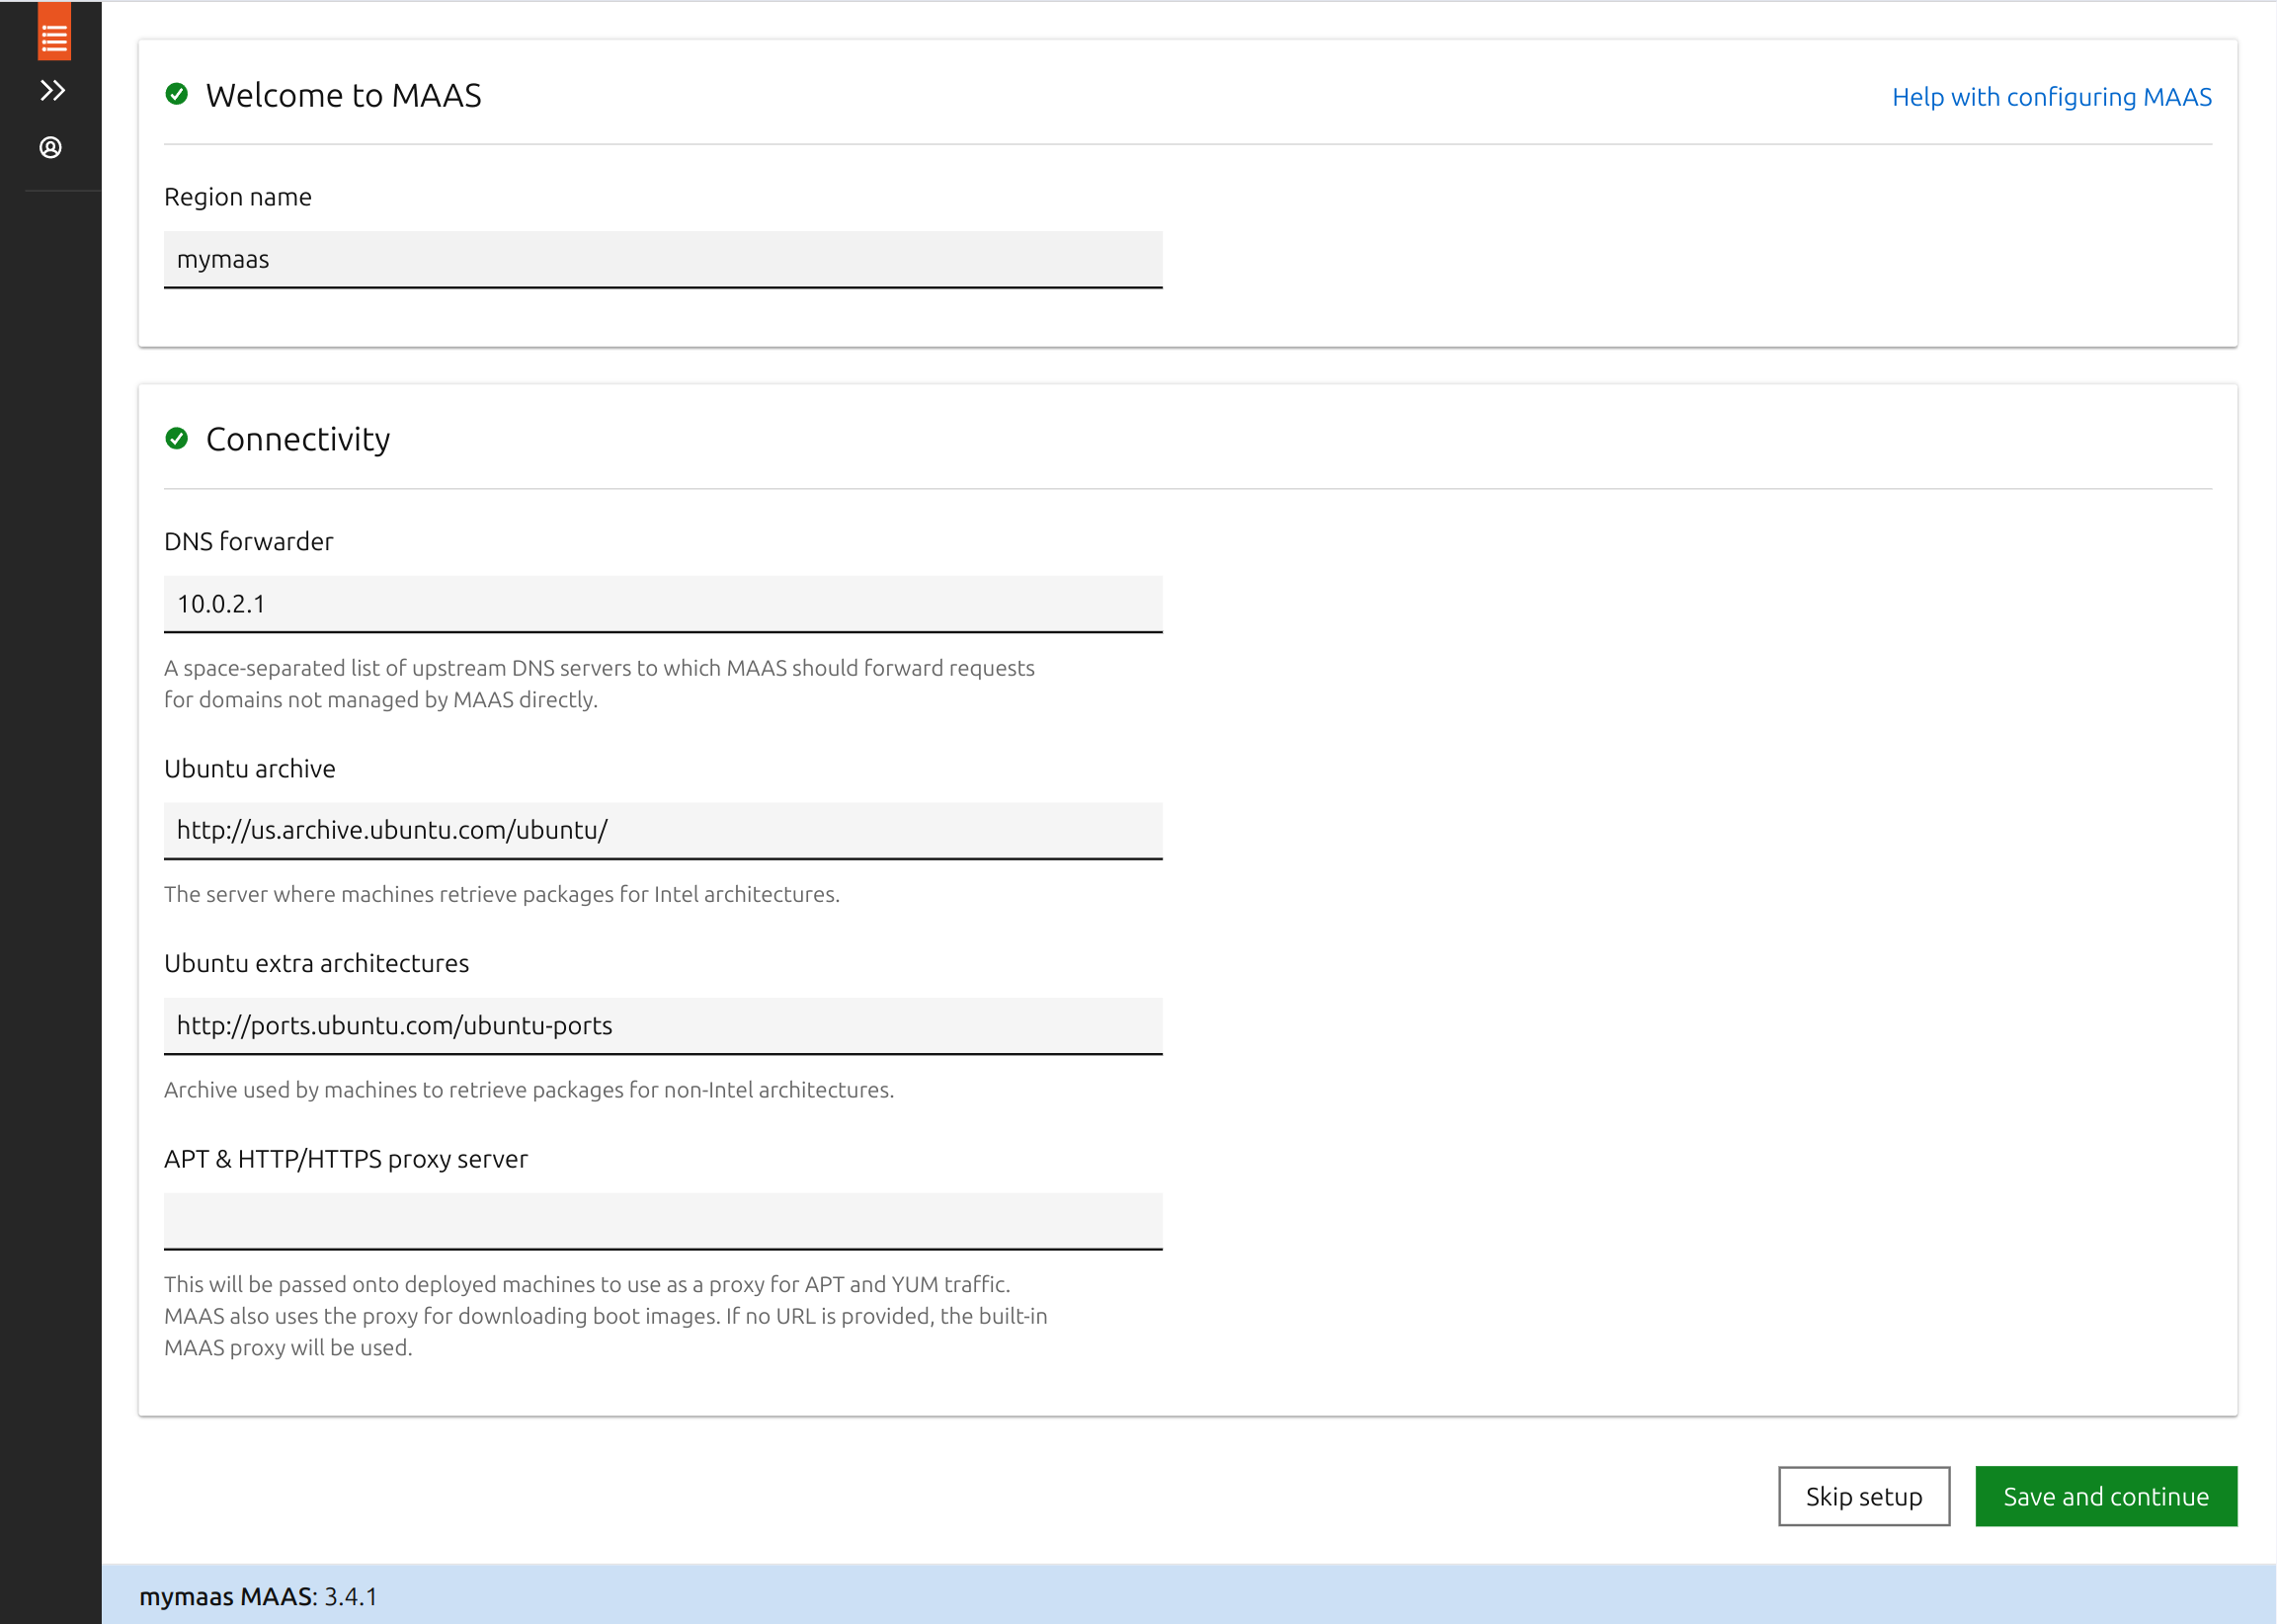
5.2. Initial Setup
Once you log in, MAAS presents a screen in which you can set a few options, as shown below. Review these settings, changing any as necessary, and click Save and Continue at the bottom of the page. (If in doubt, leave the settings as-is; you can change them later, if necessary.)
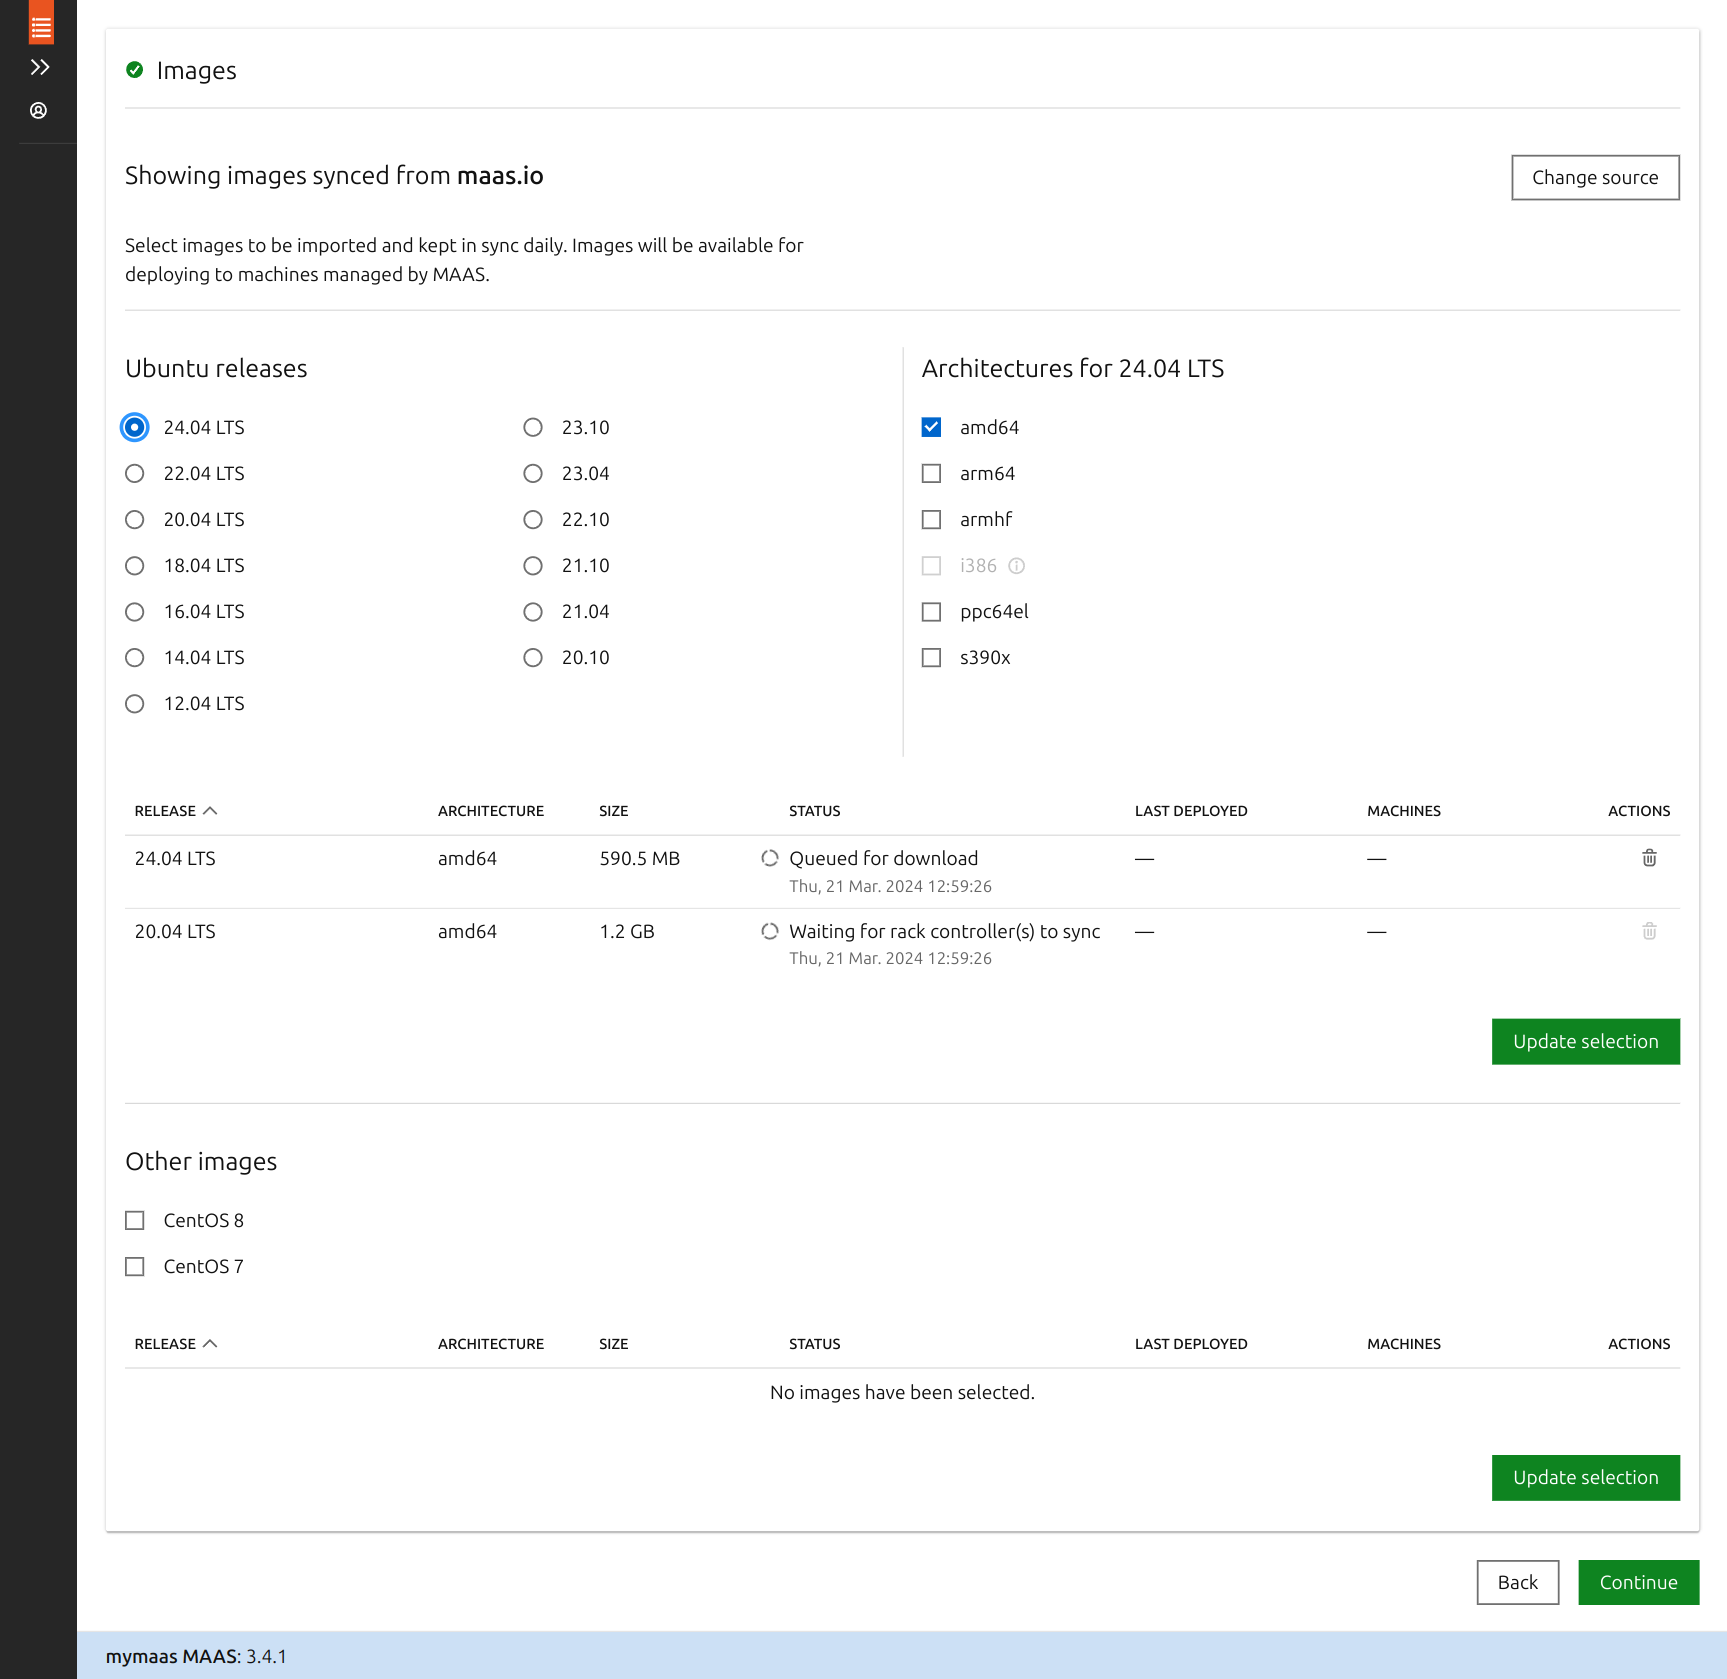
5.3. Import OS Images
MAAS now shows a list of OS images, as shown below. This page will probably show Ubuntu 26.04 for AMD64 already synced or importing. You probably don’t need to do anything with this page right now, and you can come back to it later; however, if you know you must test with an unusual architecture or something other than 26.04, you may want to import additional images immediately:
Select additional Ubuntu releases using the radio buttons, and for each release, pick the architectures you want to import.
Click Update Selection. The image download process will begin immediately.
When you’re done making changes, scroll down and click Continue.
You now see an information page with the message “MAAS has been successfully set up.”. Click Finish Setup button to complete the setup.
5.4. Configure SSH Keys
You can now import additional SSH keys from GitHub or Launchpad, or upload them individually. Once you’ve imported all the keys you need, scroll down and select Finish Setup.
5.5. Configure Network
After the initial setup, MAAS shows a page summarizing computers it has discovered on the network. You can review this information, but you shouldn’t need to do anything on this page.
To review and adjust common MAAS configuration settings:
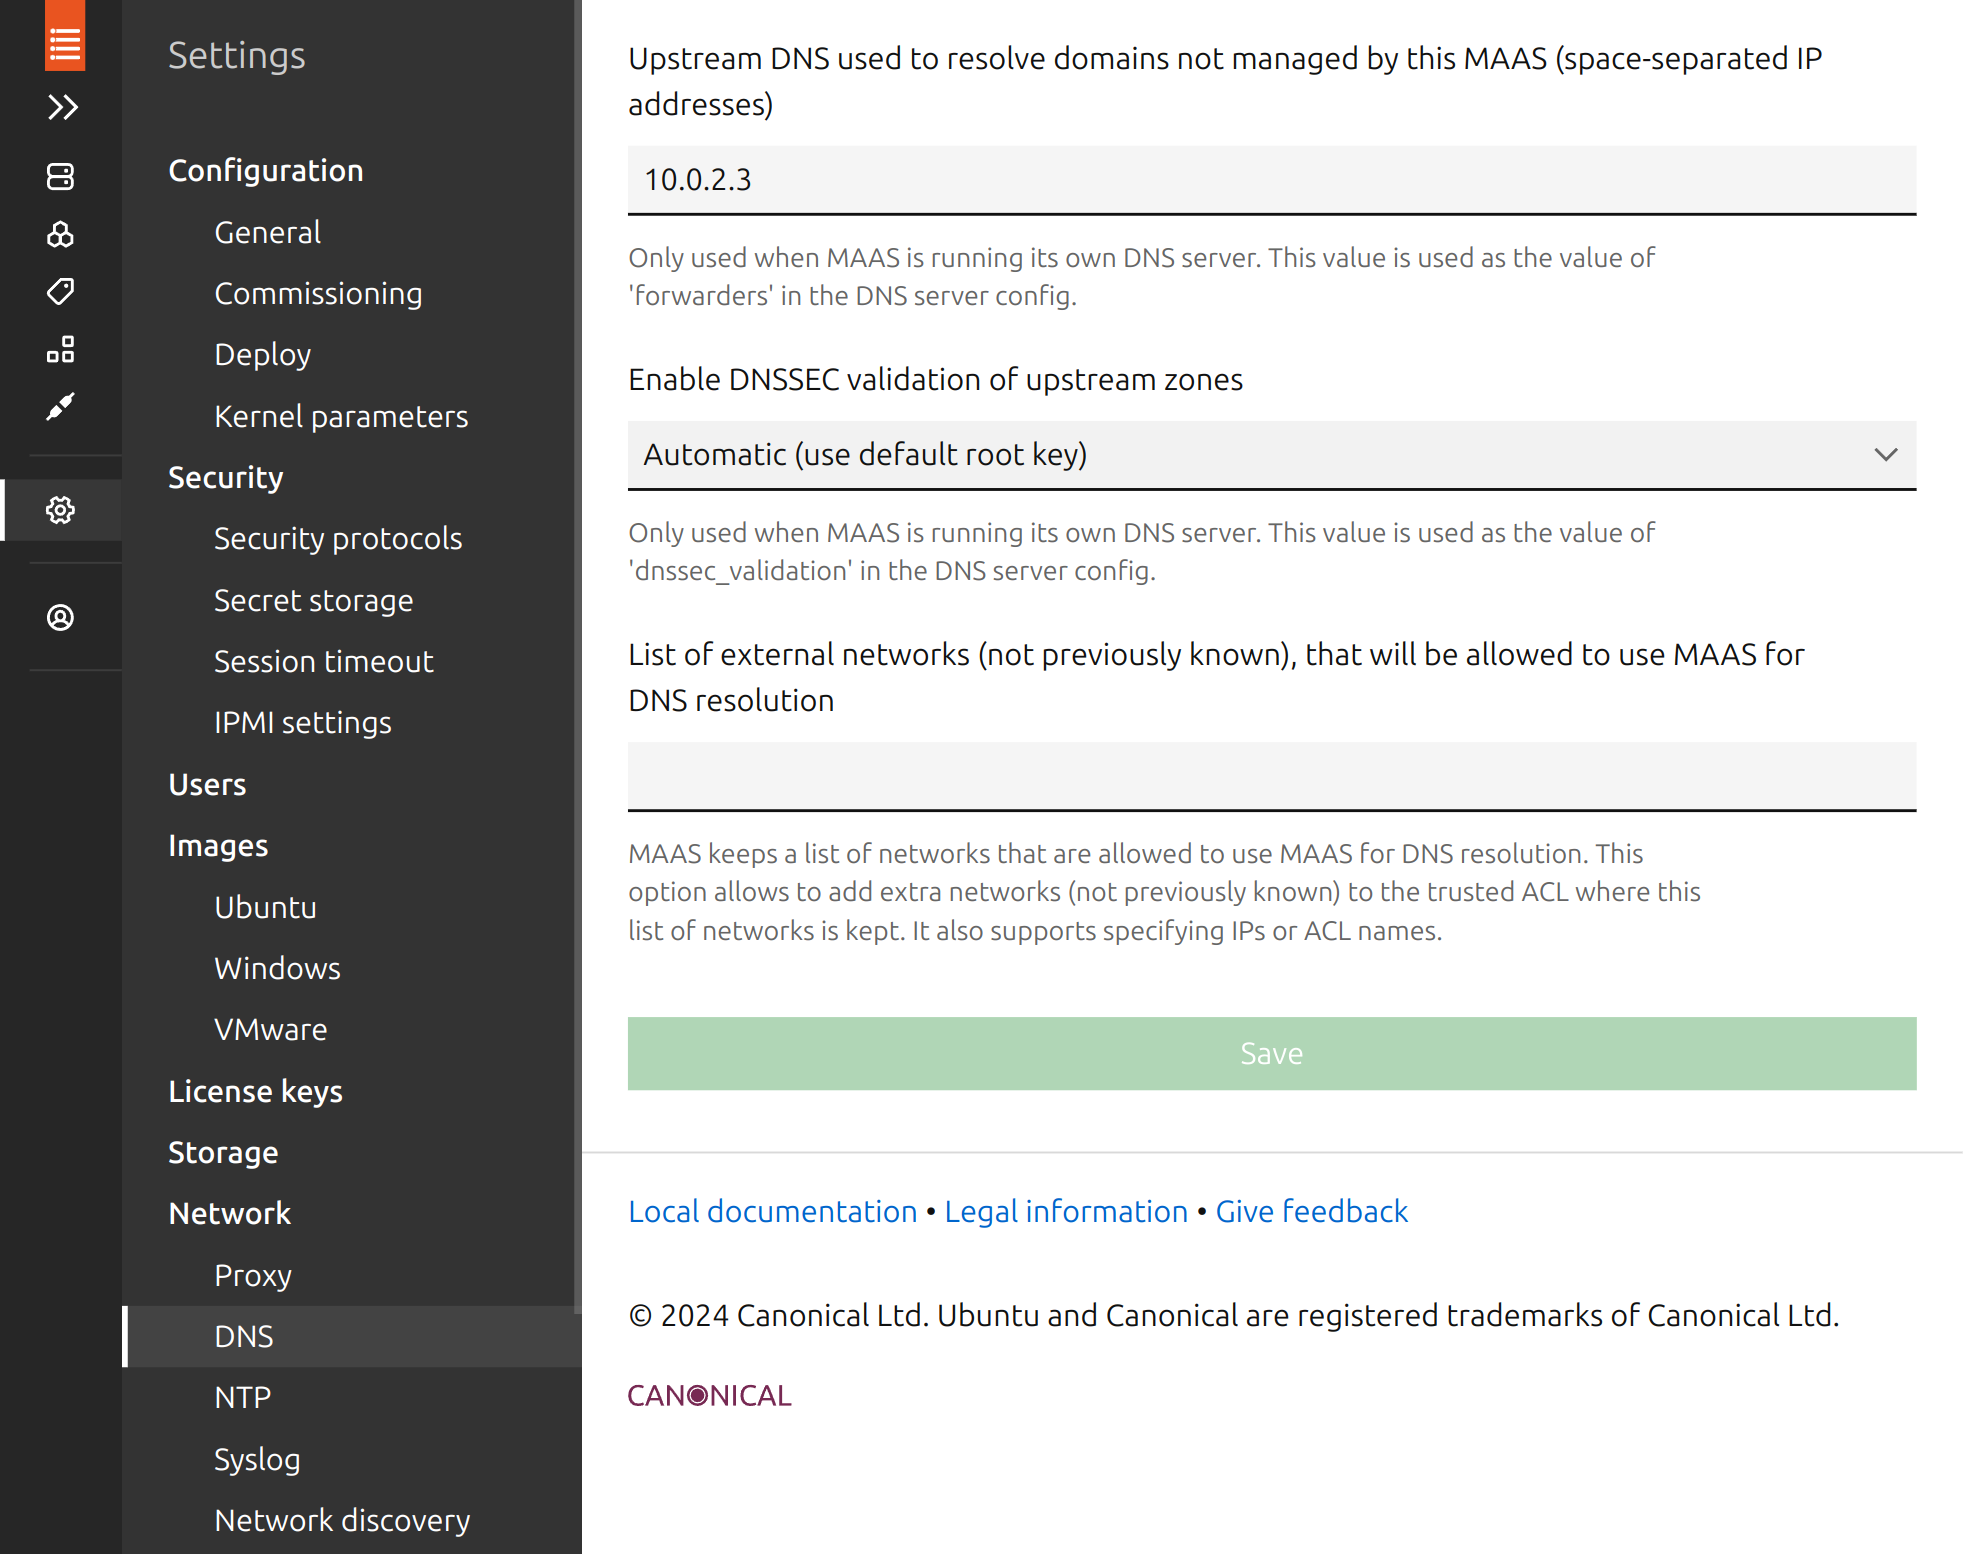
In the left panel, click Settings -> Network -> DNS to review your DNS settings here. The default for Enable DNSSEC Validation of Upstream Zones is Automatic, which must sometimes be adjusted. Some private DNS servers are misconfigured and will cause problems. Changing this setting to No may be required in such cases. (Alternatively, configuring the upstream DNS server to support DNSSEC should fix the problem.) If you change this option, be sure to click Save.
Select Settings -> Network -> Network Discovery. In theory, this feature should passively detect devices and should cause no problems. In practice, it sometimes triggers security alerts on the external network. If you run into this problem, change this setting and click Save.
You can review other settings in the MAAS Settings page. This page is broken into several subsections, navigated via the list on the left of the page – Configuration, Security, Users, Images, and so on. If you change any settings, be sure to click the associated “Save” button within that section.
To review the DHCP options, click Network -> Subnets in the left panel:
Click the subnet range for the internal network (
172.24.124.0/22in this example) to check the details of the subnet: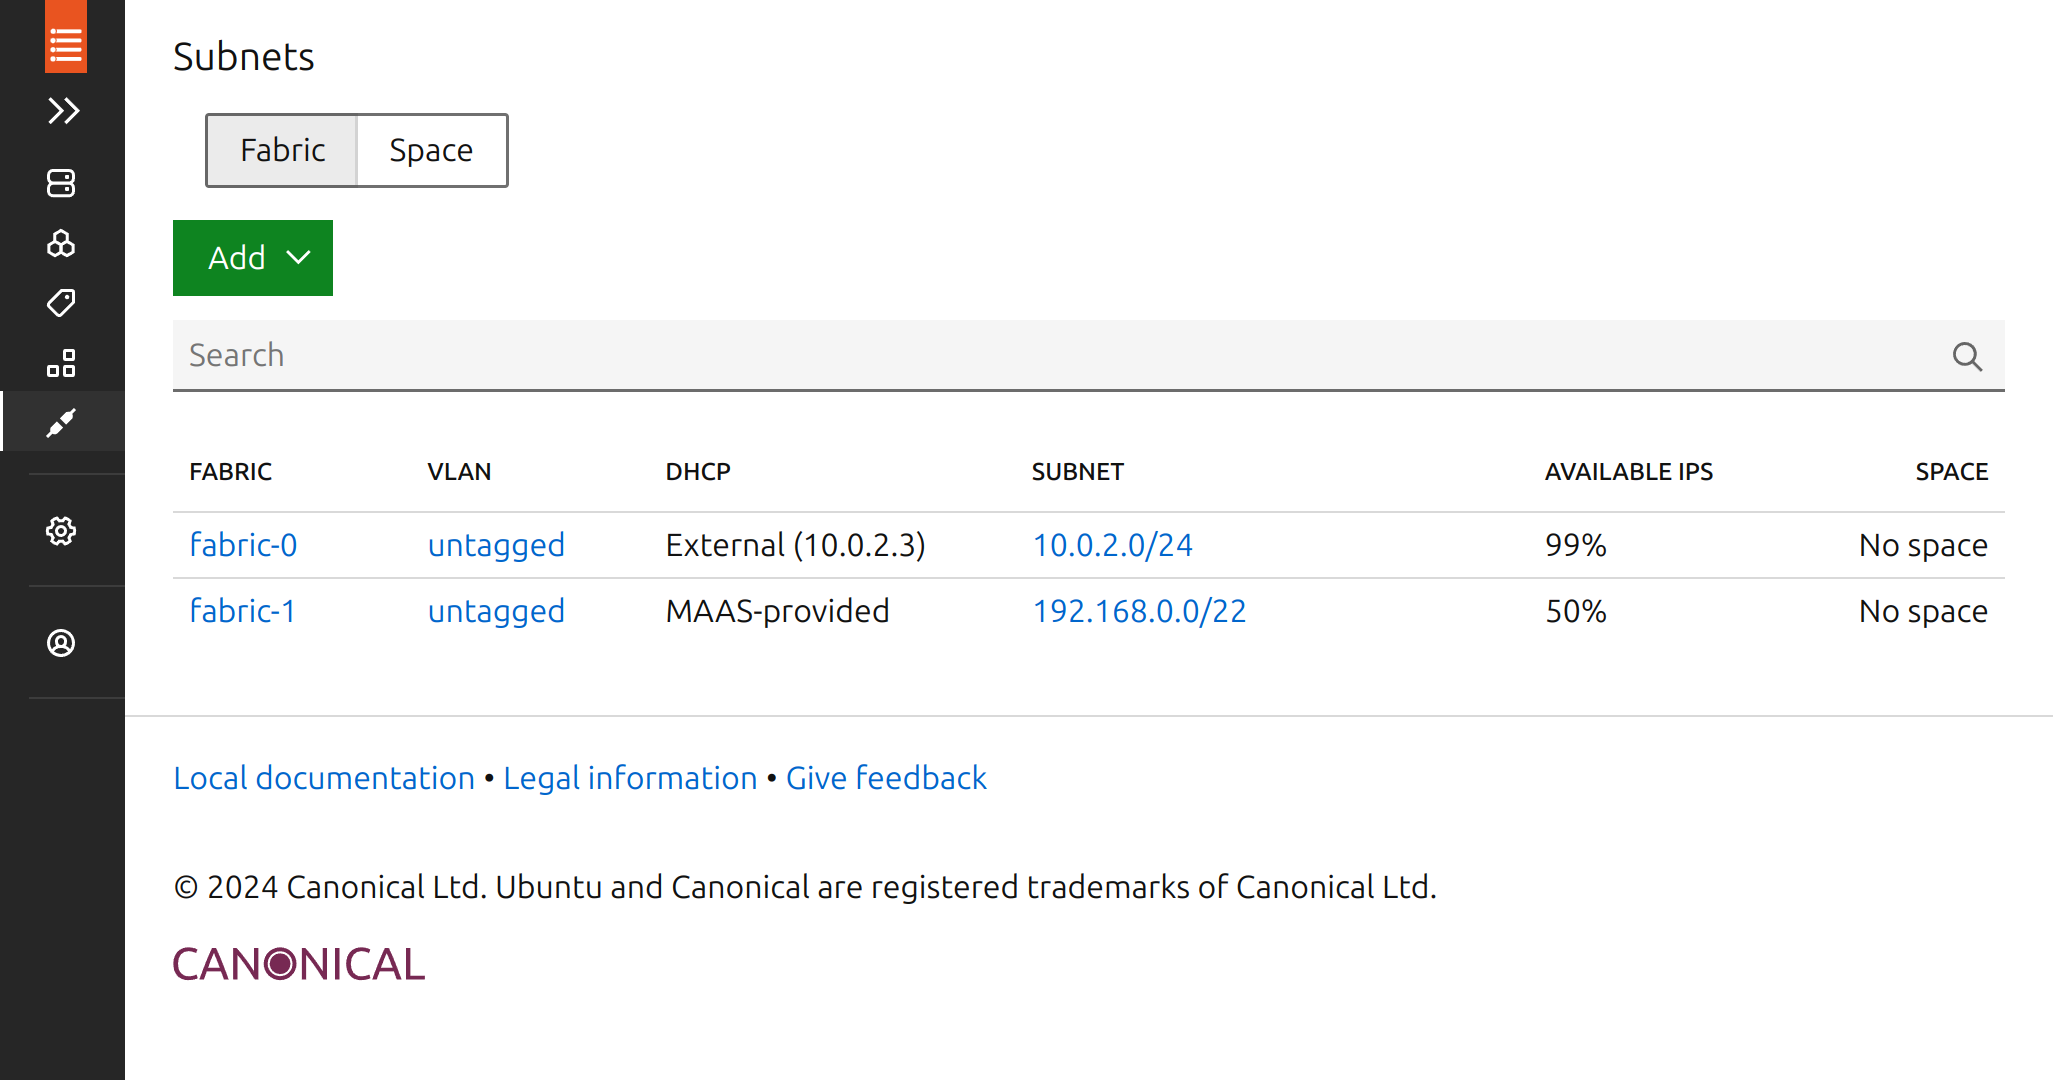
Your network, of course, may be different from this example, particularly if you have unused network devices, which will show up as additional “fabrics.”
On the page for your internal network, scroll down about halfway to view the Utilisation and Reserved Ranges sections. At this point, about half the addresses will be classified as “used” because
setup-certlabset them aside as reserved or as managed by DHCP. The “available” addresses are those that do not belong to either of these categories; MAAS assigns them to nodes that are deployed using its standard settings. (See Appendix C: MAAS Network Ranges for details of how MAAS manages its network addresses.)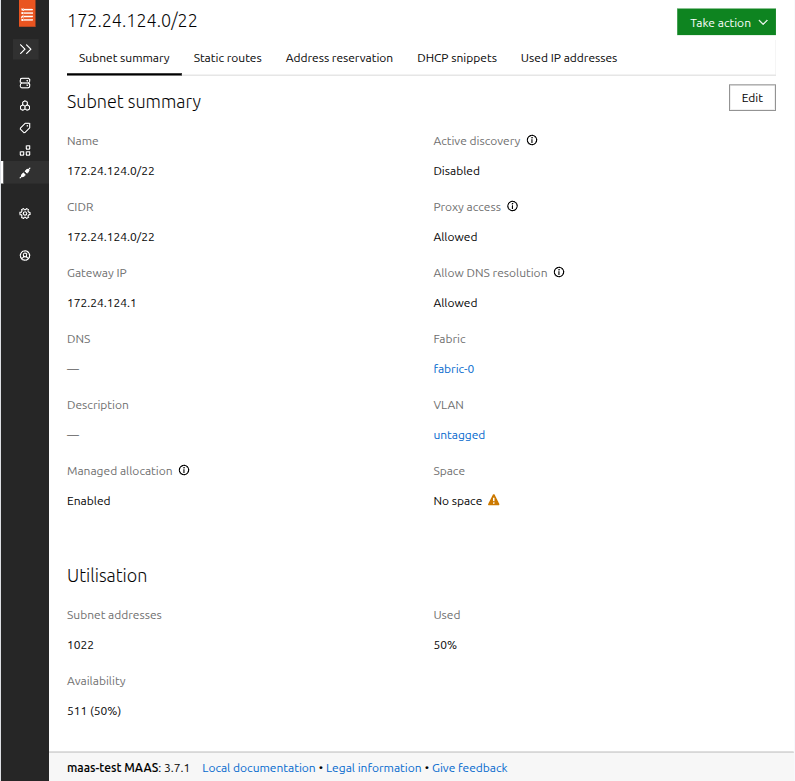
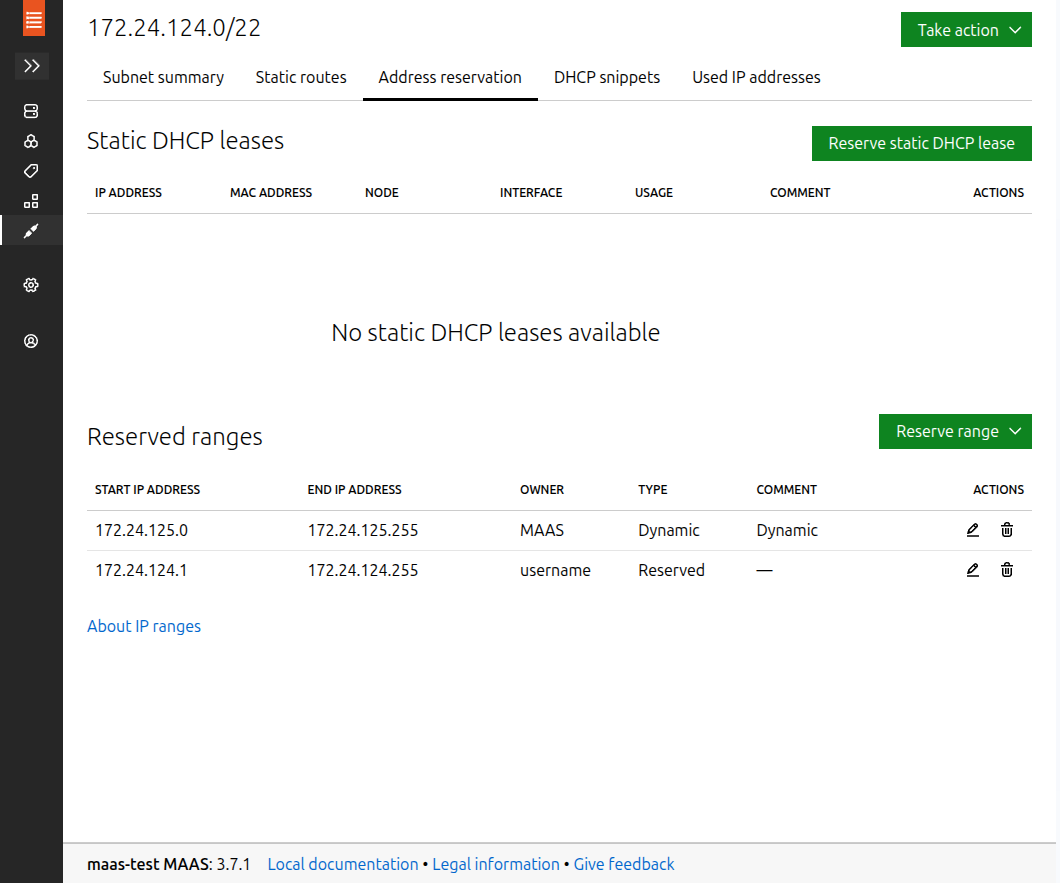
If the various ranges (reserved, dynamic, or the implicit available addresses) are not appropriate, you can edit them as follows:
Click the edit icon near the right side of the page in the row for the range you want to delete or modify. You can then change the start and end addresses, and then click Save to save your changes.
If you want to completely delete the range, click the trash can icon instead of the edit icon. To function properly, MAAS must have at least a small reserved range (for the MAAS server itself, at a minimum) and a dynamic range (to support enlisting, commissioning, and deploying nodes).
You can optionally reserve additional ranges by using the Reserve Range button, which provides two sub-options: for machines not managed by MAAS (using the Reserve Range sub-option) or for DHCP addresses (using the Reserve Dynamic Range sub-option).